Google Workspace Training / User / Calendar
Get Calendar productivity tips
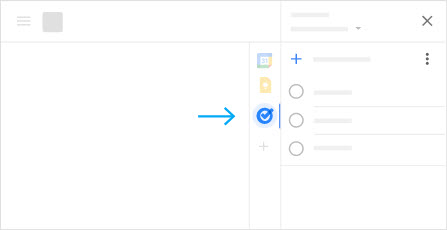
You can use Calendar to keep track of tasks.
- Choose an option:
- In Calendar, on the right, click Tasks
 .
. - If it’s the first time you’re opening Tasks, at the bottom, click Get Started. (If you don’t see Tasks, at the bottom right, click Show side panel <.)
- In Calendar, on the right, click Tasks
- (Optional) To create a new task list:
- At the top under Tasks, click the Down arrow > Create new list.
- Add a name and click Done.
- (Optional) To change lists, click the Down arrow and select a list.
- Click Add a task + and enter a task.
- (Optional) To add details or a due date, click Edit
 .
.
Note: Assign a different color to your tasks so you can tell them apart from events. At the left, under My Calendars, point to Tasks, click ![]() and select a color.
and select a color.
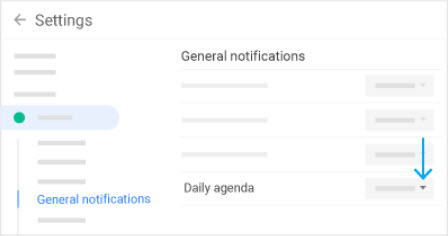
Get your daily agenda in your inbox
You can get an email each morning with your daily agenda.
- In Calendar, go to Settings
 > Settings.
 - On the left, click your calendar.
- Click General notifications.
- Next to Daily agenda, click the Down arrow and select Email.
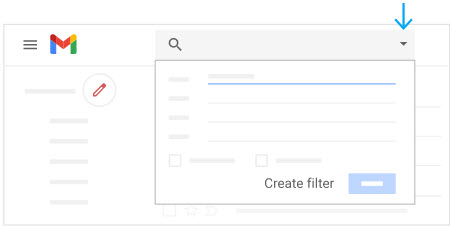
Use filters to move Calendar responses out of your Gmail inbox
- In the Gmail search box, click the Down arrow.
- In the To field, enter your email address.
- Next to Has the words, enter invite.ics OR invite.vcs.
- Check the Has attachment box.
- Click Create filter.
- Check the Apply the label box and choose a label to automatically sort incoming event response messages.
- If you want response messages to be automatically moved out of your inbox, but want to be able to access them later, check the Skip the Inbox Archive it box.
- Click Create filter.
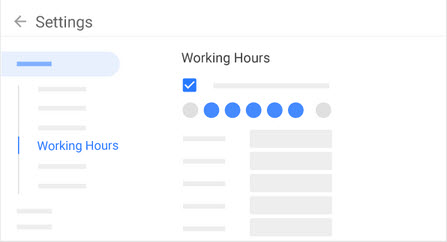
Set working hours
If you’d prefer not to be invited to events outside of your working hours, you can adjust your Google Calendar settings so organizers know to reschedule an event to a better time.
- In Calendar, go to Settings > Settings.
- On the left under General, click Working Hours.
- Check the Enable working hours box.
- For each day, click the time when you’re available. Suggestions might already appear, but you can click the time to change them.
- (Optional) To set the same times for every day, click Copy time to all.
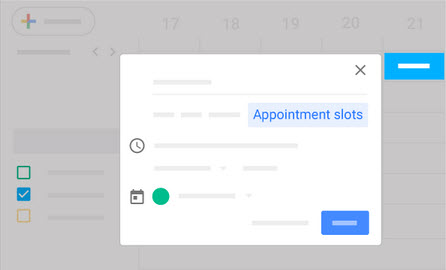
Add appointment slots to Calendar
You can set up a single appointment with bookable slots in your calendar. For example, you might want allow people to book a time to review a proposal.
- In Calendar, at the top, select Week or Day.
- Single-click the first day you want to start your appointments.
- Click Appointment slots.
- Add a title and choose the timeframe for appointments.
- Next to Slots with duration, enter a length of time for each appointment.
- (Optional) To add more details, such as a description or room or to add repeat blocks, click More Options.
- (Optional) To invite people to book slots, click More Options. Under Event details, copy the This calendar’s appointment page link and email it to people.
Note: Appointment slots show as a single event in Calendar, with a grid icon in the upper left corner.