Home / Platform Considerations / Kerio
Migrate from Kerio Public Folders
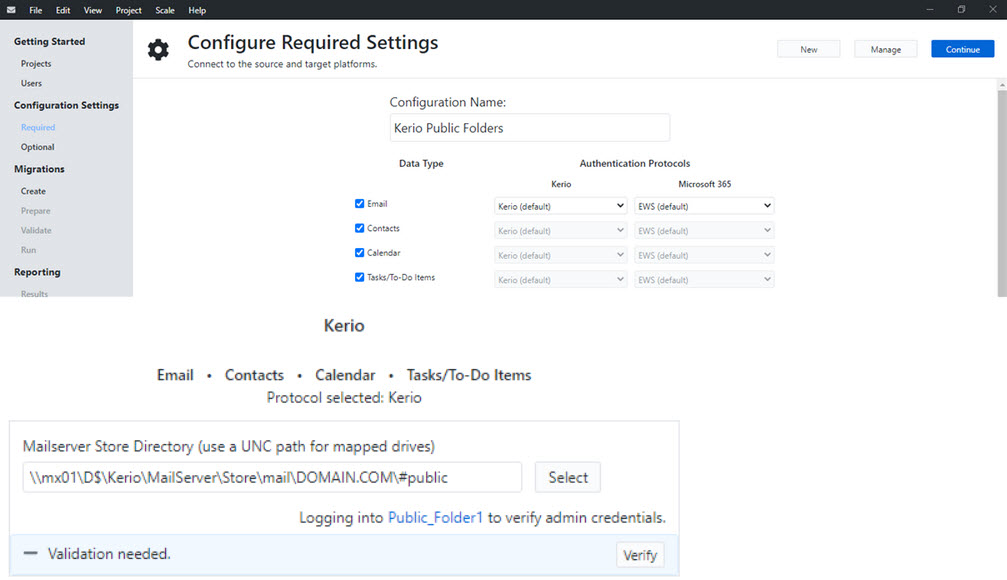
To migrate data from Kerio Public Folders, define the exact UPN path or local path (c:…if Transend Migration Console is installed on the Kerio Server machine) to #public folder which contains all Kerio Public Folders. Under each Public Folder is a #msgs folder with EML files that will be migrated.
Migrate all data types directly from Kerio file system
To migrate Public Folder data directly from the Kerio file system, create a new Project in Transend Migration Console.
Create a UNC path to the Kerio Public Folder #PUBLIC folder.
Note: All Email, Calendar, Contacts and Task data can be migrated at the same time in the same configuration by checking the specific data type you want to migrate.

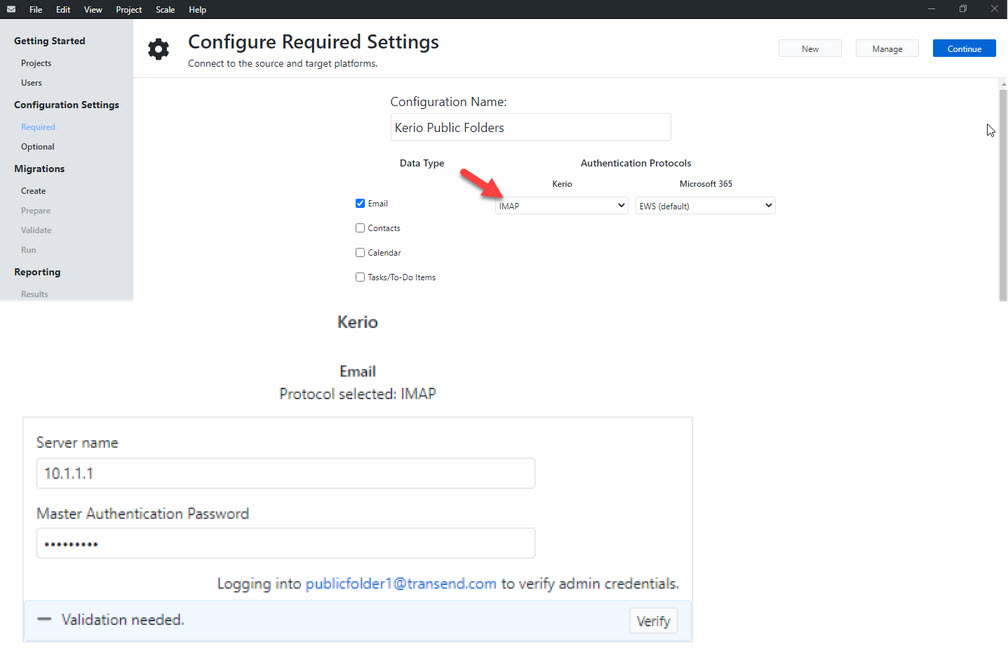
Migrate Email only via IMAP
When migrating only email data from a Public Folder, it is recommended you migrate via the IMAP protocol.
Follow these steps to configure Master Authentication on your Kerio server:
- Open the Kerio Connect Admin Console to the Configuration panel.
- Select Advanced Options > Click on Master Authentication tab.
- Enter Master Password, confirm Master Password and Set the IP Range to include the migration workstations.
Now that you have configured Master Authentication on your Kerio server, follow these steps to configure Transend Migration Console for migration:
- Create a new Project to migrate Kerio Public Folders.
- Use the email address to connect to the Kerio Public Folder via IMAP.
- Enable Master Authentication to migrate data from Kerio Public Folders.
Notes:
-
Use the IMAP protocol if you only need to migrate Email data (and not calendars, contacts, tasks).
-
IMAP supports the migration of the Email data type only.
