Home / Platform Considerations / Google Workspace
Google Workspace Authentication
To migrate bulk accounts to or from Google Workspace/Gmail (formerly called G Suite) without end-user passwords (admin authentication), you will need to set up a Google Service Account.
You will grant permission to a service account to access your Google Workspace data. In most cases this will be a service account created by you.
Notes:
- When inputting an email address as requested below, primary email addresses are required. If an alias email address is used, errors will occur.
- To migrate a single mailbox (or a few mailboxes) without usage of a Service Account, view instructions to migrate individual accounts with end-user authentication.
Google Service Account
Follow the steps below to create a Google Service Account.
Note: If you are trying to create a Google Service Account and receive an error message that says Service account key creation is disabled, you must first Enable Service account key creation.
To create a Google Service Account, perform the following steps:
In the Google Cloud Platform Create a project.
Click CREATE PROJECT on the right side of the screen.


Assign a Project Name, an (optional) Organization and then click CREATE.

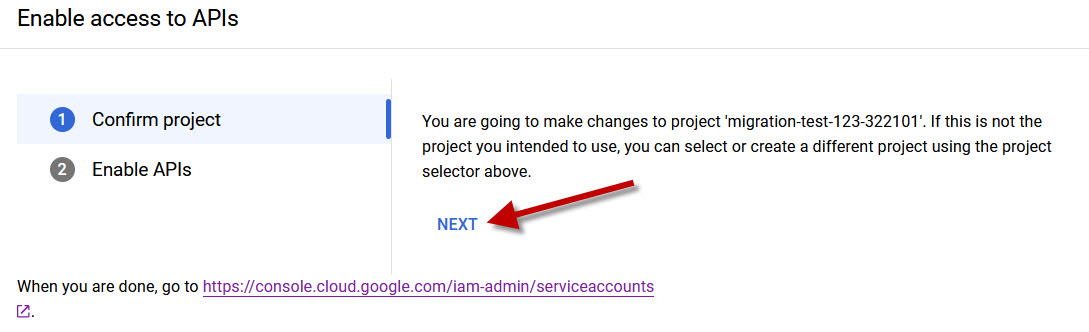
To Enable Access to APIs, Confirm project by selecting NEXT.
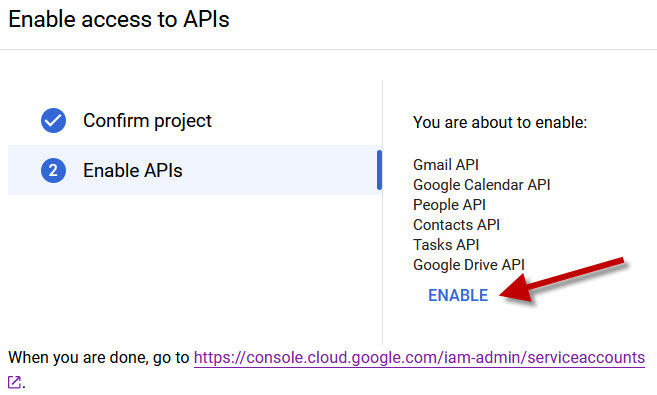
Enable APIs by clicking ENABLE.
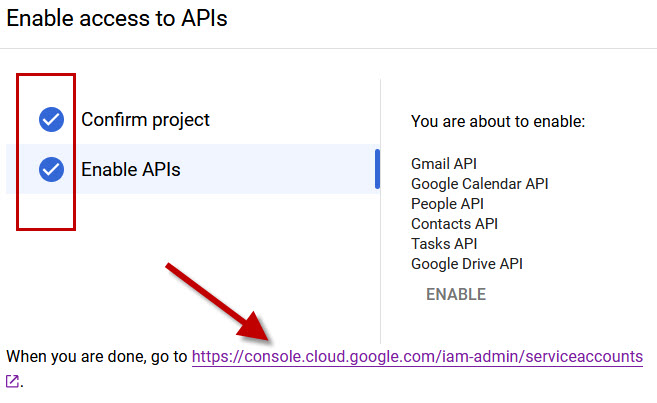
When you see all APIs have been enabled (displayed with a checkmark) click the link at the bottom.
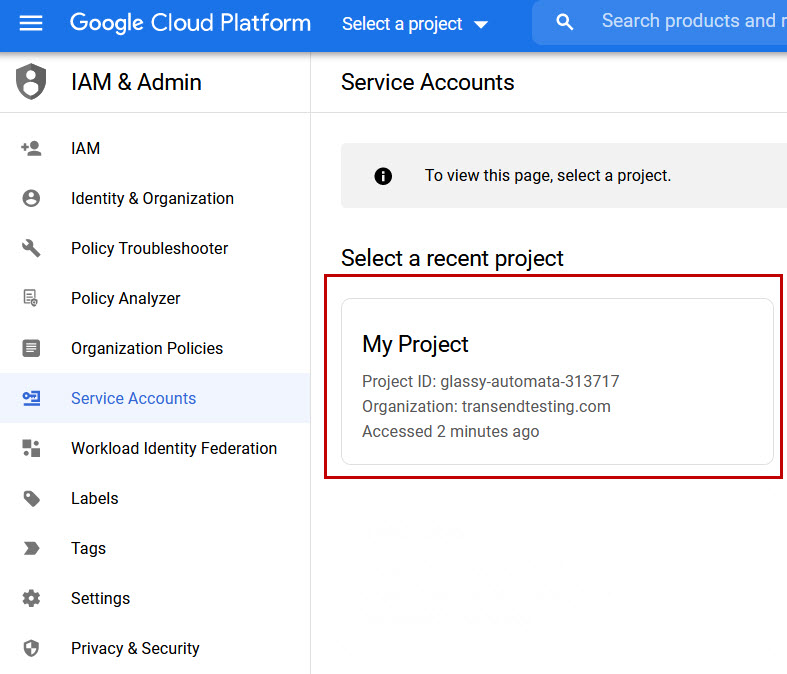
Select the Project you just created, which by default will be called My Project unless you assigned it a name.
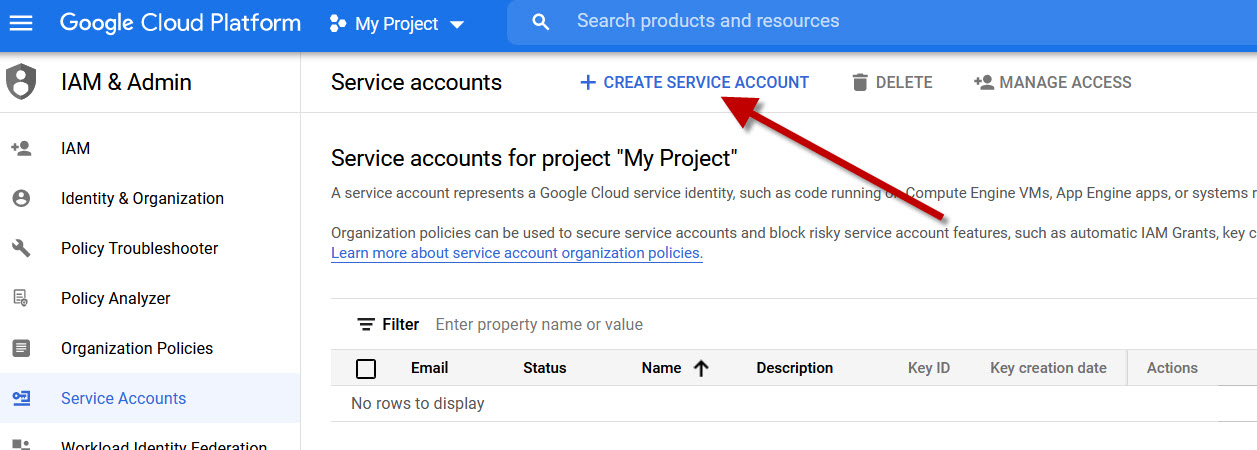
Click + CREATE SERVICE ACCOUNT at the top of the screen.
In the Service account name field, enter Transend as the name and then click DONE.

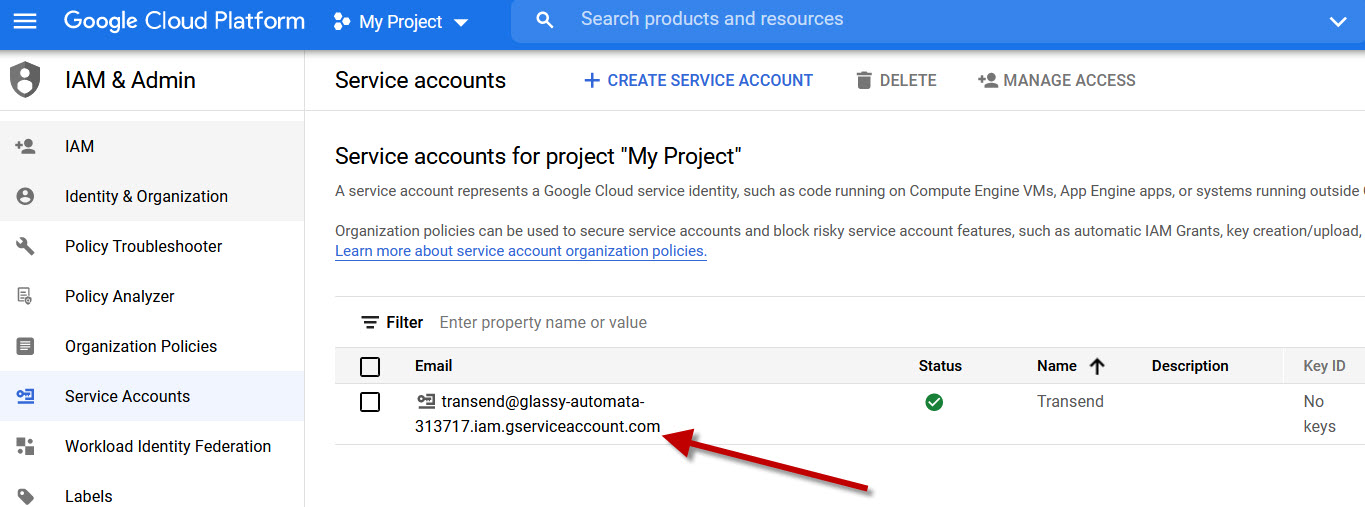
Click your Service Account’s email address.
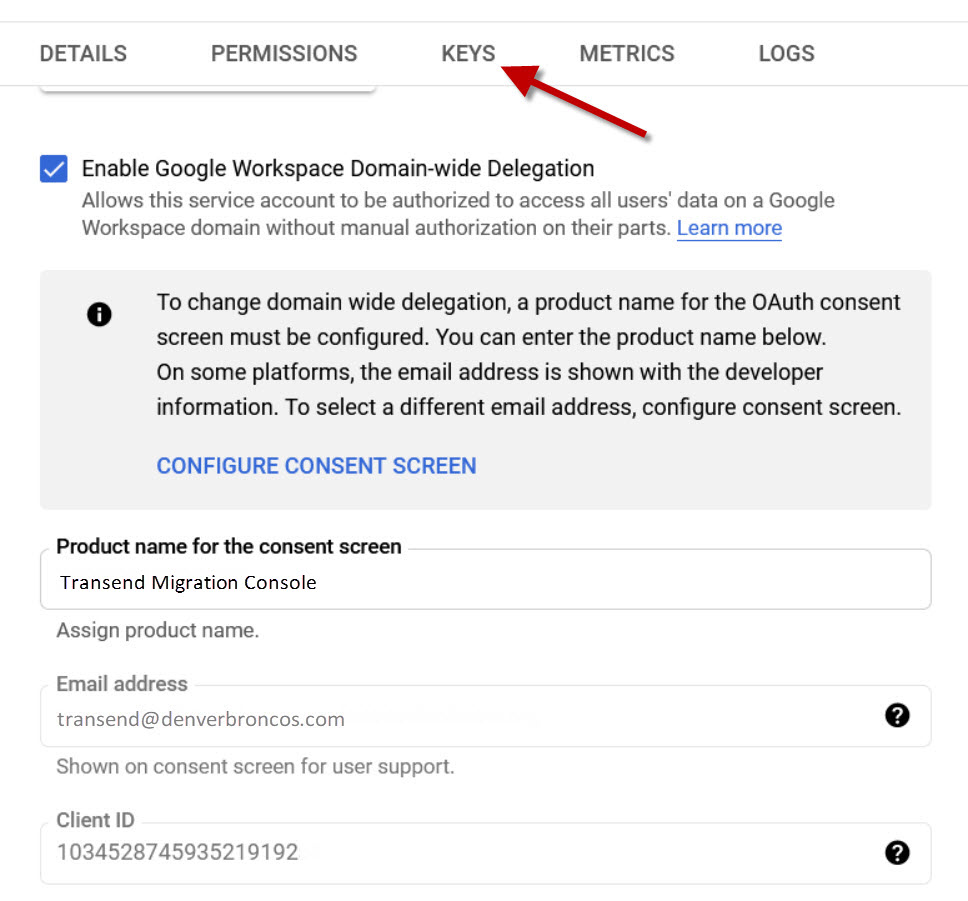
Click the Keys tab at the top.
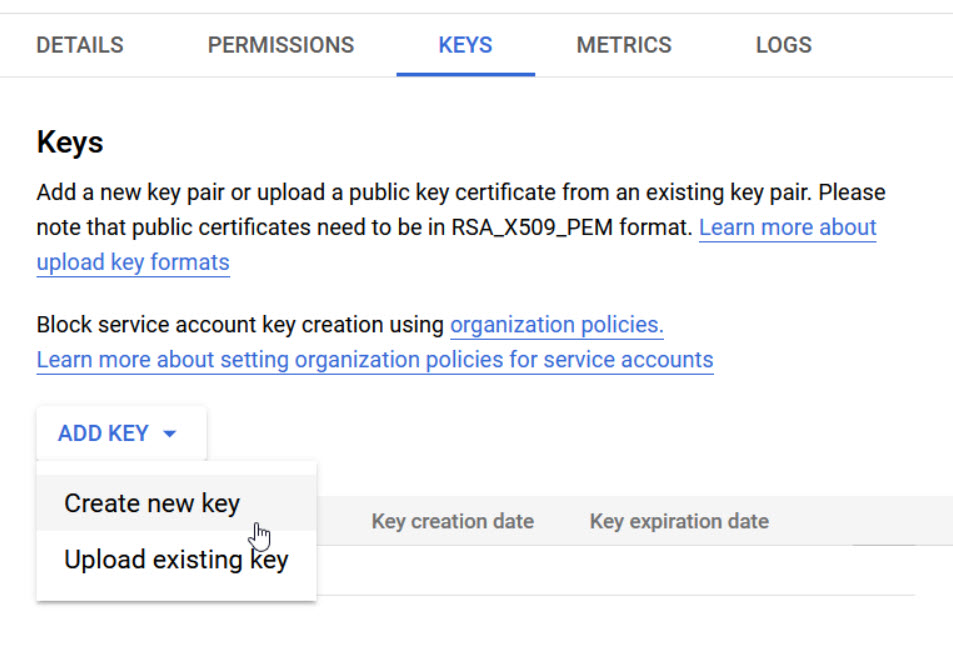
Click Add Key > Create new key.
Note: If you get an error message that “Service account key creation is disabled”, follow these steps to Enable Service account key creation.
Confirm JSON key type is selected and click CREATE.
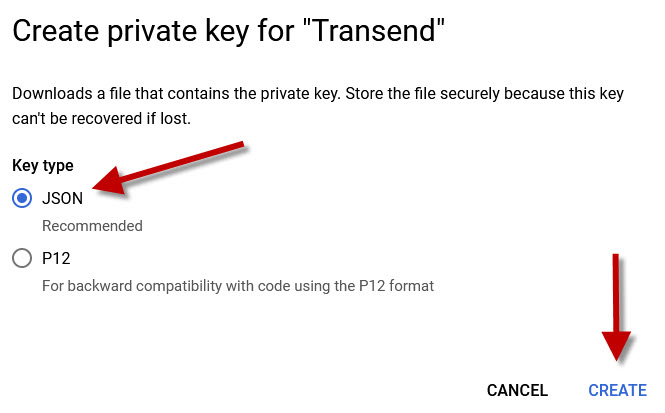
Note: The P12 key is also supported, but the JSON key is required if Transend will be migrating files from/to Google Drive as part of a Services engagment.
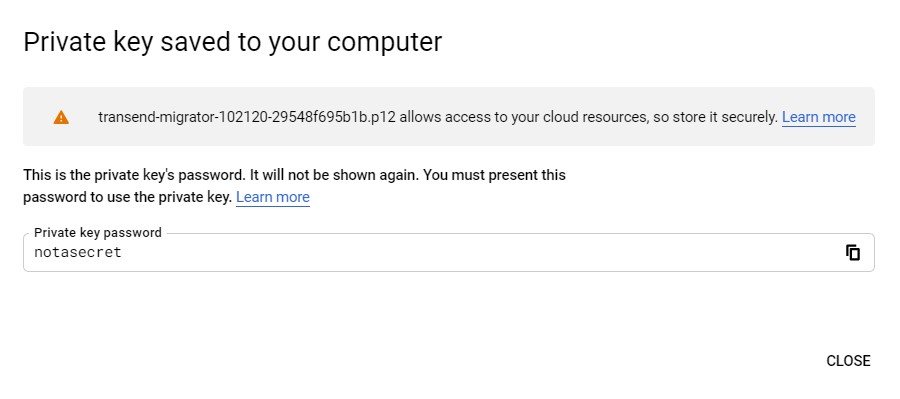
The Private key is downloaded to your Downloads folder.
Copy the Private key to the following directory:
c:\ProgramData\Transend
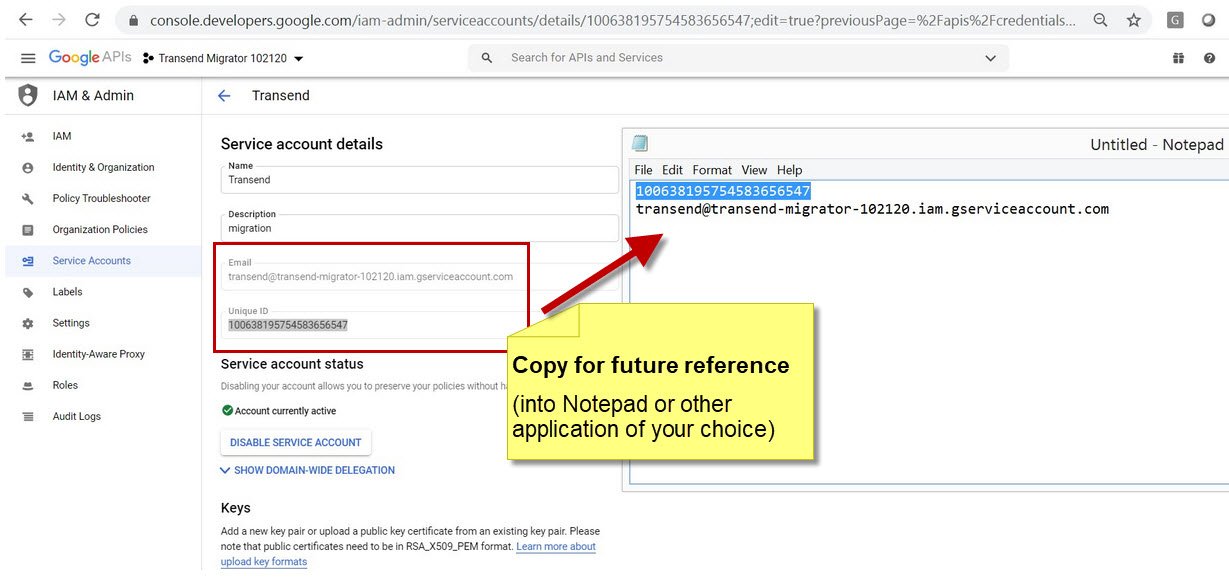
Click the Details tab at the top and copy the service account email address and Unique ID into notepad.
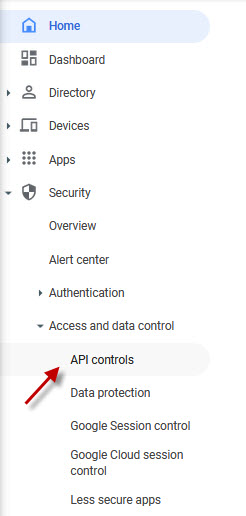
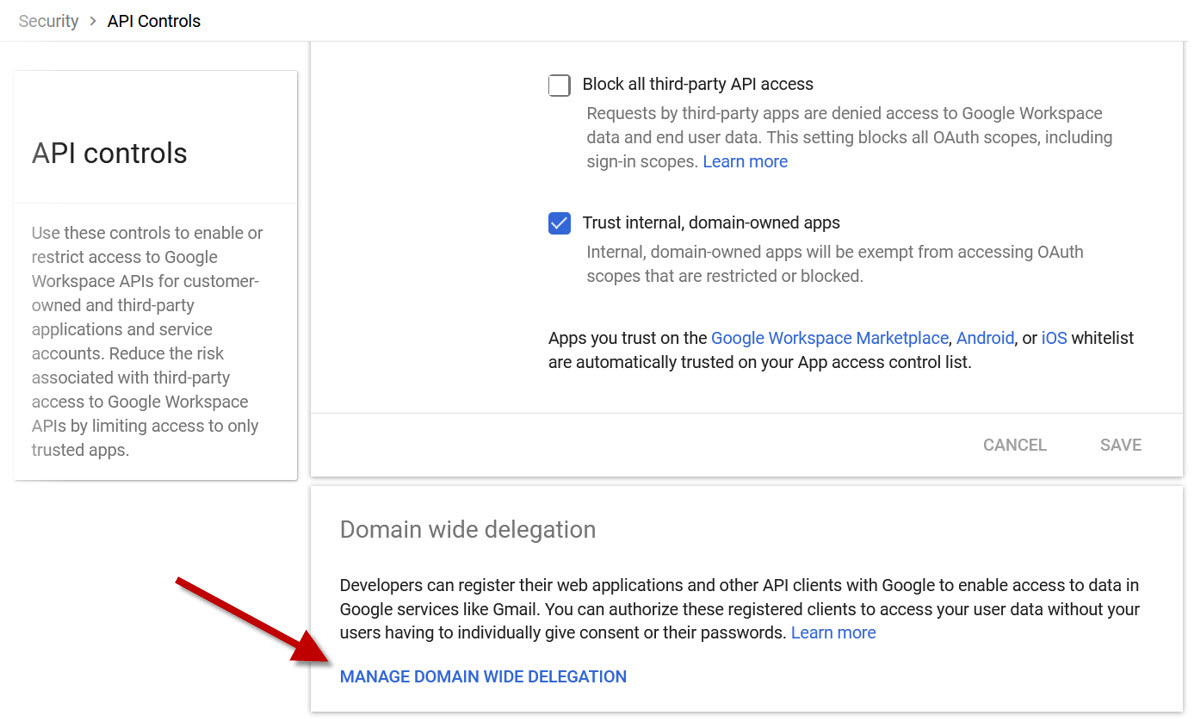
Open the Google Admin Console.
Click Security > Access and data control > API controls.
Click MANAGE DOMAIN WIDE DELEGATION.
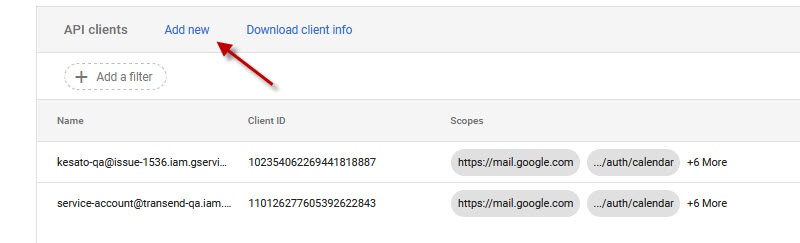
Click Add new at the top of the screen.
In the Client ID field, paste in the Unique ID that you previously copied into Notepad.
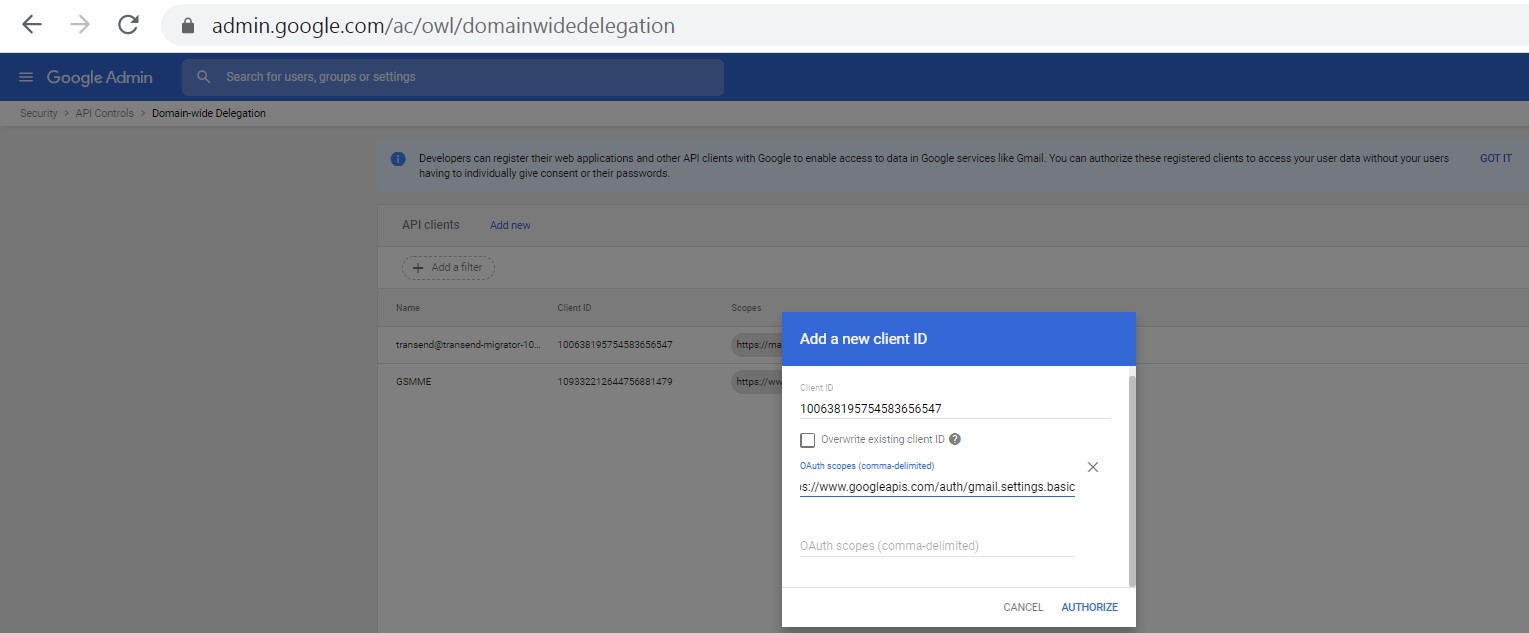
OAUTH Scopes:
Highlight the below scopes and click Ctrl-C to copy the scopes into Notepad, into a single line comma delimited. Then paste it into the OAUTH Scopes field.
Important: To maintain proper encoding you must use Ctrl-C when copying scopes. If you right click to copy you will lose important characters like commas and colons.
Click Authorize.

Enter credentials into Transend Migration Console
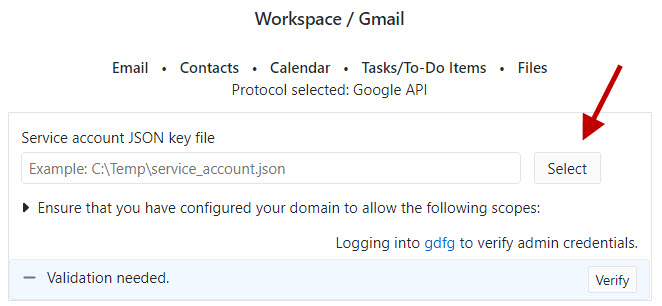
Enter the following Service Account credentials into Transend Migration Console on the Configuration > Authentication screen:
Service account JSON key file – Click the Select button to browse to the Private key you saved to the following directory in step 14:
c:\ProgramData\Transend
Congratulations! The Google Service Account is now setup and ready for use with Transend Migration Console.