Home / Platform Considerations / M365 Authentication Options
EWS Basic Authentication (Impersonation)
Assign the ApplicationImpersonation role to your migration account using the Exchange Admin Center, or use Exchange PowerShell. Impersonation allows you to migrate user accounts with the migration account’s credentials so you do not have to provide user passwords.
Requirements:
Prior to setting up ApplicationImpersonation, we recommend you confirm you’re using the primary SMTP email address of each account (including your administrative account).
- All mailboxes (including the admin account) must be active and licensed mailboxes in M365.
- All shared mailboxes must be set up as licensed mailboxes (not aliases, distribution lists or groups). After migration you may convert them to shared mailboxes and remove the license (shared mailboxes don’t require licenses).
- Transend can only migrate data into a primary email address, and cannot connect to an alias.
Learn how to identify the primary SMTP address of a mailbox.
Set up Impersonation in New Exchange Admin Center
We recommend creating a cloud-only service account with a licensed mailbox from Microsoft 365 Admin Portal > Users. Make sure you first Disable Multi-factor authentication for this account.
- Create a user account (i.e. [email protected]) and assign ApplicationImpersonation role.
- Use the primary SMTP email address of the migration account and user accounts to connect to M365 mailboxes.
- For Exchange (on-prem) the login can be one of the following (depending on the Exchange Server settings. Test with OWA to determine the login syntax):
- Email address
- Domain\user name
- UPN
- The account (i.e. [email protected]) must be a licensed mailbox in M365.
Log in to the Microsoft Admin Center:
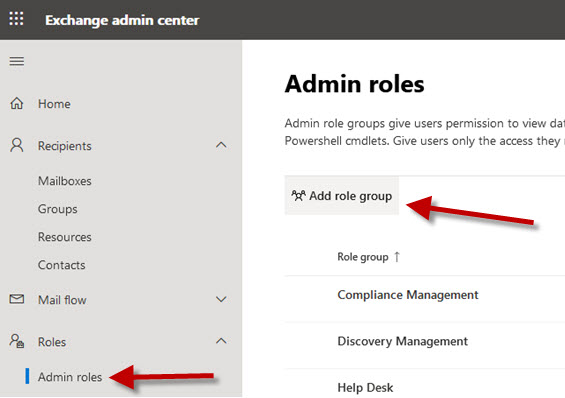
Click Roles > Admin roles in the side navigator.
Click Add role group button.

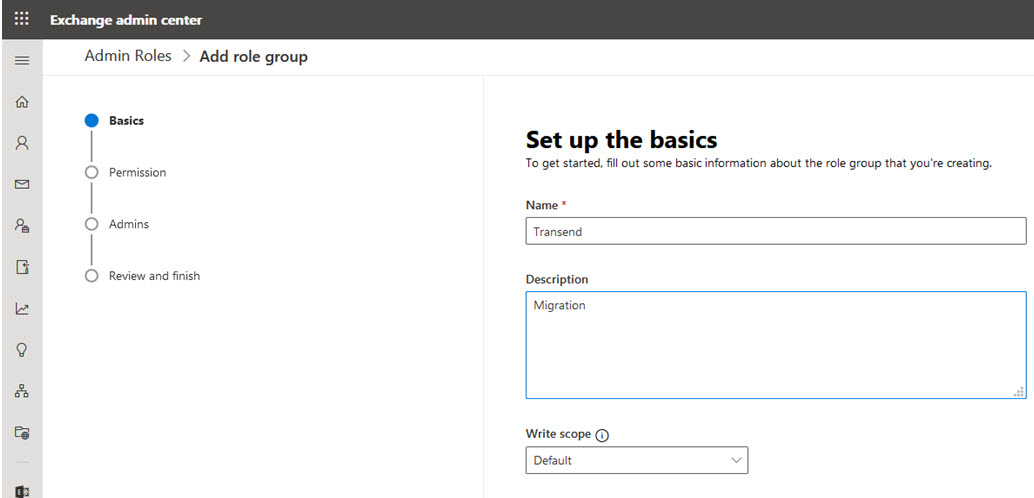
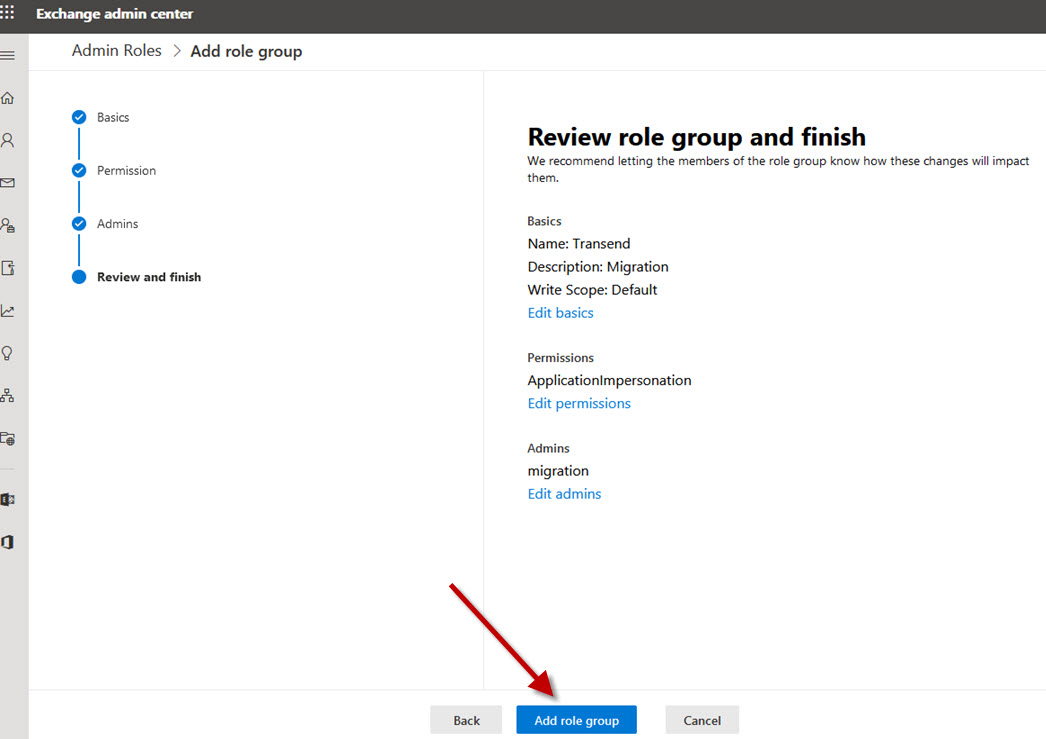
Enter Role Name and Description. Click Next.
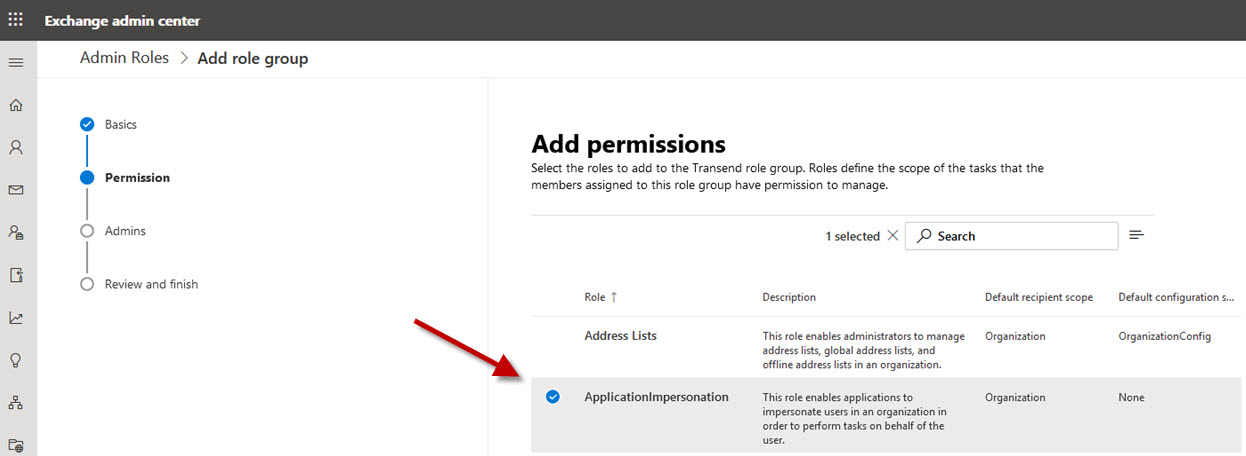
Select ApplicationImpersonation and click Next.
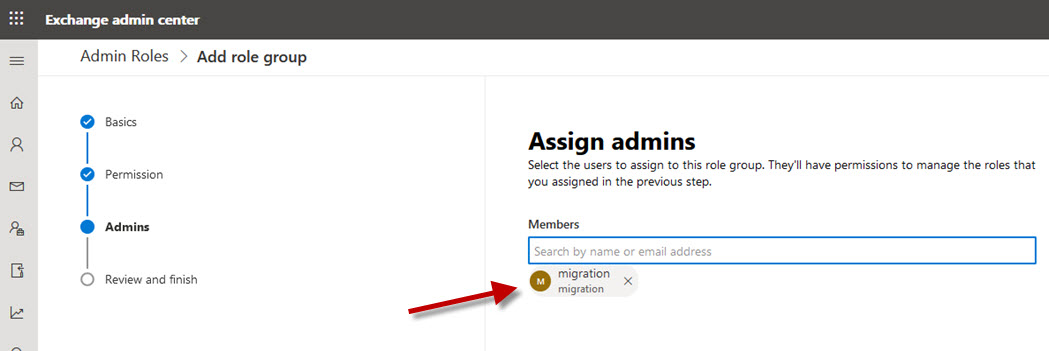
Add the migration account and click Next.
Click Add role group.
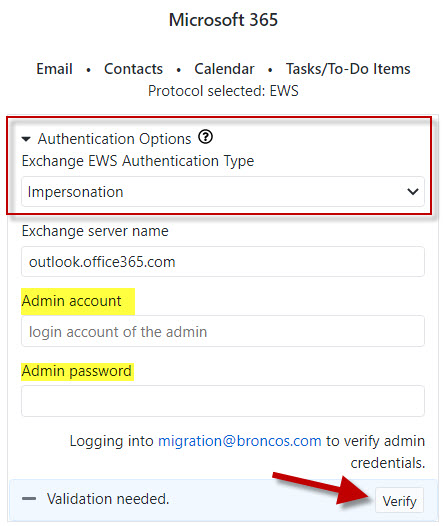
In Transend Migration Console, navigate to the Configuration Settings > Required screen, expand the Authentication Options section and select Impersonation.
Add the account (i.e. [email protected]) and Password into the Admin account and Admin password fields.
Click Verify to validate the connection is working using EWS Impersonation.
Setting up Impersonation with Powershell
- Open the Exchange Management Shell.
- Run the New-ManagementRoleAssignment cmdlet to add the permission to impersonate to the specified user.
- Change “ServiceAccount” to the account you are assigning impersonation to.
The following example shows how to configure Application Impersonation to enable an administrator account to impersonate all other users in an organization:
Example:
New-ManagementRoleAssignment –Name:impersonationAssignmentName – Role:ApplicationImpersonation –User:serviceAccount Debug Application Impersonation Rights
Click on Service Account Access and perform the login test for the migration account: